Effective Wall Usage
In Quoridor, how you use your 10 walls is more important than how you move your pawn. Understanding the efficiency of walls is the first step to becoming a master.
The Protective Wall: Securing Your Path
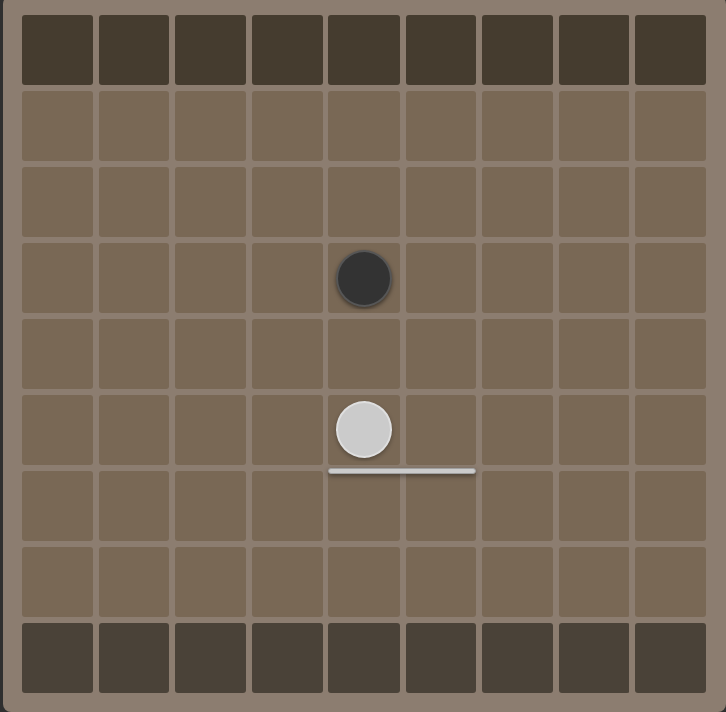
A simple but powerful principle is to **place walls behind your pawn, not in front of it.** If you place a wall just behind your pawn after you've moved past a certain point, **only your opponent has to detour around it.** This defensive move secures the path you have just taken and can be a solid response to an opponent's aggressive wall placement. By protecting your rear, you force the opponent to find a completely new angle of attack.
Advanced Tactic: Controlling the 3x3 Zone
The 3x3 area immediately in front of a pawn is a critical battleground. Controlling this zone with walls can be used for both powerful offense and defense.
Offensive Use: The 3x3 Trap
A powerful offensive technique is to trap the opponent's pawn within a 3x3 area. By placing walls to block their forward and side exits, you can force them to waste at least one extra turn moving sideways or backward before they can advance again. This puts the opponent in a dilemma: waste turns maneuvering, or use their own valuable walls defensively to escape. Either choice gives you a significant tempo advantage.
Defensive Use: Securing Your Path
Conversely, this concept is also a crucial defensive tool. By proactively placing your walls in the 3x3 area **in front of your own pawn**, you are claiming that territory. This physically prevents the opponent from placing their walls in the most effective spots to block you. Securing your own 3x3 zone is a way to build a safe "tunnel" for yourself, guaranteeing an efficient path forward and forcing the opponent to find a less optimal, longer route to intercept you.
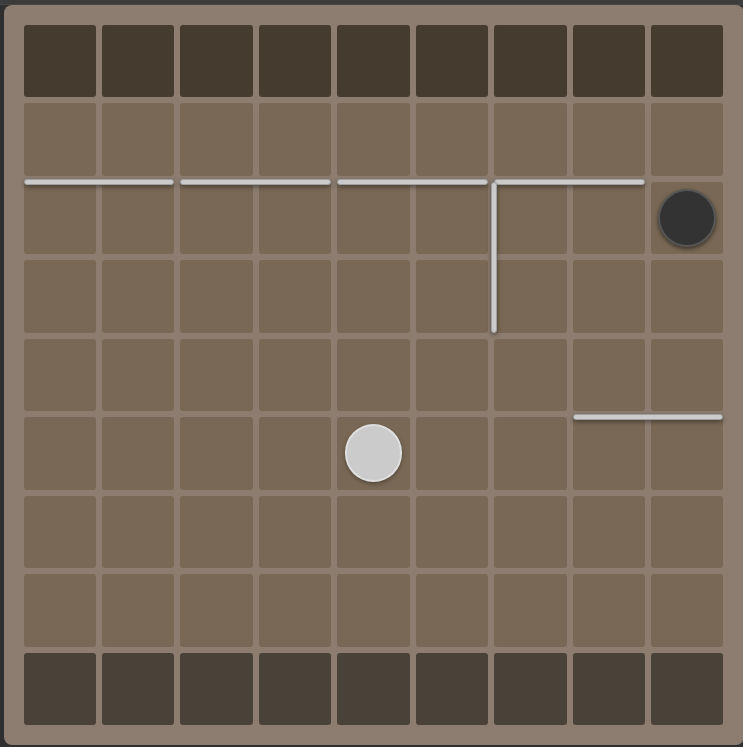
The image above shows a situation where the opponent (white) has created a 3x3 zone. Without a defensive wall, black is now vulnerable to further obstruction.
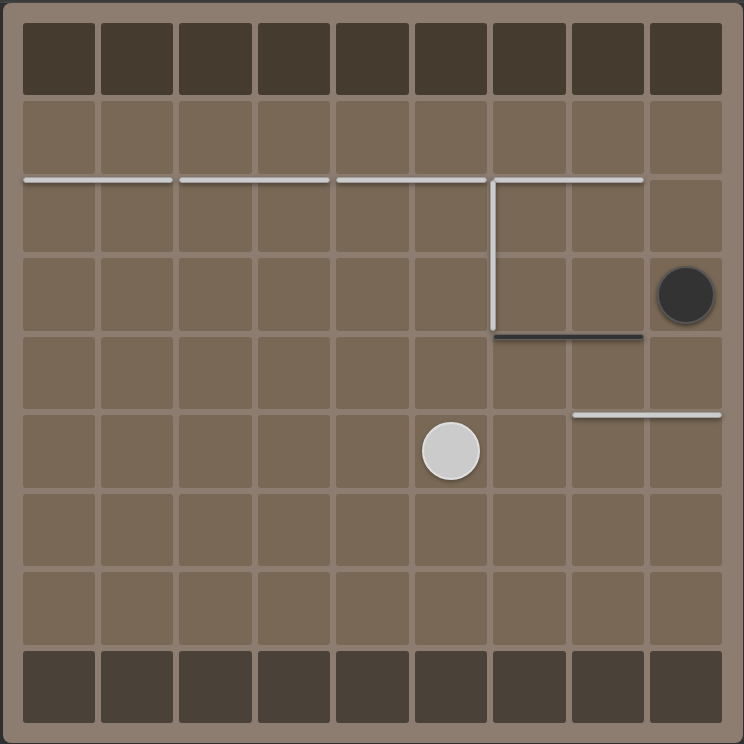
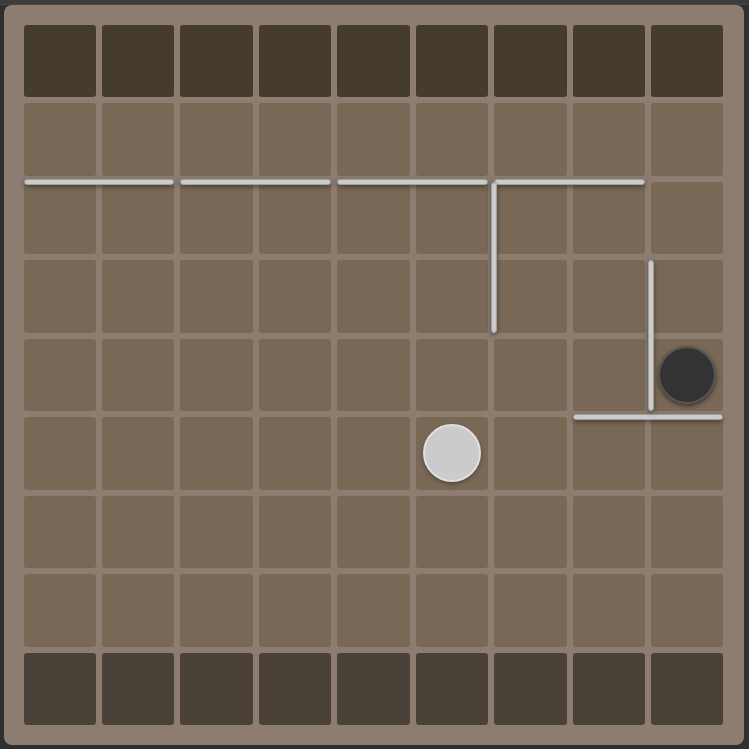
The image above shows a good response. After the opponent has committed walls to form the 3x3 zone, the black pawn places a defensive wall to secure its escape path and prevent the opponent from tightening the trap further.
The True Value of a Wall: Turn Value & Resource Management
Is it a good move to use one of your turns to place a wall that increases the opponent's path by one move? It might seem like a fair 1-for-1 trade, but this overlooks a critical fact: **walls are a finite resource.**
- Your Cost: 1 Turn + 1 Wall
- Opponent's Loss: 1 extra move (equivalent to 1 turn)
When you account for the spent wall, a simple 1-for-1 turn trade is actually a **net loss in terms of resources**. So, when is placing a wall actually a good move? A wall placement is only profitable if the advantage gained is greater than the cost of `1 Turn + 1 Wall`.
Conditions for a Profitable Wall
- Path Lengthening > 1: The most obvious profitable wall is one that increases the opponent's path by **two or more moves**. This creates a direct and quantifiable tempo advantage.
- Gaining Strategic Advantage: A wall that increases the opponent's path by just one move can still be a brilliant play if it provides an additional strategic benefit. Examples include:
- Seizing Jump Initiative: Forcing the opponent to take one extra step can be game-winning if it means you are the one to initiate the decisive jump.
- Forcing a Bad Position: Forcing the opponent's pawn away from the powerful central columns and towards the edge of the board.
- Securing a Future Path: Building a "tunnel" for yourself that guarantees a safe route later in the game, as described in the 3x3 Zone tactic.
Therefore, the new rule of thumb for an efficient wall is: **"A move that uses my 1 turn and 1 wall to either increase the opponent's path by 2 or more moves, OR increase it by 1 move while gaining an additional strategic advantage."**
The Fluidity of Wall Value: The Importance of Context
The "profitable wall" conditions above provide a good baseline, but the true value of a wall is highly fluid and changes depending on the context of the game. A wall that seems inefficient based on numbers can be a game-winning move in the right situation.
- Game Phase: A wall placed in the late game is often far more valuable than one in the early game. In the opening, the opponent has plenty of space to find alternative routes. In the endgame, when paths are narrow and committed, a single wall can be the final, decisive blow.
- Opponent's Remaining Walls: Placing a wall is much more powerful when your opponent has few or no walls left. If they cannot place a counter-wall, they are forced to spend many turns navigating your obstruction. Your last wall is often your most powerful one.
- Board Position: The value changes based on location. A wall that forces an opponent to the edge of the board might be strategically more valuable than one that creates a simple two-move detour in the center, as it limits their options for the rest of the game.
쿼리도에서 10개의 벽을 어떻게 사용하느냐는 말을 어떻게 움직이는지보다 중요합니다. 벽의 효율을 이해하는 것이 고수가 되는 첫걸음입니다.
나를 보호하는 벽: 경로 확보하기
단순하지만 강력한 원칙은 **벽을 내 말 앞에 두는 것이 아니라, 내 말 뒤에 두는 것**입니다. 내가 특정 지점을 통과한 직후 바로 그 길목을 내 등 뒤에 벽으로 막아버리면, **오직 상대방만 그 벽을 돌아가야 합니다.** 이 수비적인 움직임은 내가 방금 지나온 길을 안전하게 만들고, 상대의 공격적인 벽 설치에 대한 견고한 대응이 될 수 있습니다. 나의 후방을 보호함으로써, 상대방이 완전히 새로운 공격 루트를 찾도록 강제하는 것입니다.
고급 기술: 3x3 영역 장악하기
말 바로 앞의 3x3 영역은 매우 중요한 전략적 요충지입니다. 이 공간을 벽으로 통제하는 것은 강력한 공격과 수비에 모두 활용될 수 있습니다.
공격적 활용: 3x3 함정
강력한 공격 기술은 상대방의 말을 3x3 영역 안에 가두는 것입니다. 상대의 전진 경로와 옆길을 벽으로 막음으로써, 상대가 다시 전진하기 전에 옆이나 뒤로 최소 한 턴 이상을 허비하도록 강제할 수 있습니다. 이는 상대를 딜레마에 빠뜨립니다. 턴을 낭비하며 함정 안에서 움직이거나, 귀한 자신의 벽을 수비적으로 소모하여 탈출해야 합니다. 어느 쪽을 선택하든 당신은 상당한 템포 이점을 얻게 됩니다.
수비적 활용: 나의 경로 확보
반대로, 이 개념은 매우 중요한 수비 기술이기도 합니다. **자신의 말 앞의** 3x3 영역에 미리 벽을 설치하는 것은 그 영토를 선점하는 행위입니다. 이는 상대방이 당신을 막기 위해 가장 효과적인 위치에 벽을 설치하는 것을 물리적으로 차단합니다. 자신의 3x3 영역을 확보하는 것은 스스로를 위한 안전한 '터널'을 건설하는 것과 같으며, 효율적인 전진 경로를 보장하고 상대가 덜 효율적인 우회로를 찾도록 강제합니다.
위 이미지는 상대방(백)이 3x3 영역을 만들어놓은 상황입니다. 수비벽이 없다면, 흑은 이제 추가적인 방해에 취약해집니다.
위 이미지는 좋은 대응수입니다. 상대가 벽을 소모하여 3x3 영역을 만든 후, 백이 수비벽을 설치하여 자신의 탈출 경로를 안전하게 확보하고 상대의 추가적인 방해를 원천적으로 차단했습니다.
벽의 진정한 가치: 턴 가치와 자원 관리
내 한 턴을 사용해서 상대의 경로를 한 칸 늘리는 벽을 두는 것은 좋은 수일까요? 언뜻 보면 공평한 1대1 교환처럼 보이지만, 여기에는 결정적인 사실이 빠져있습니다. 바로 **벽은 한정된 자원**이라는 점입니다.
- 나의 비용**: 1턴 + 벽 1개
- 상대의 손해**: 경로 1칸 증가 (1턴 추가 소모와 동일)
사용한 벽까지 고려하면, 단순한 1대1 턴 교환은 사실상 자원 면에서 **순손해**입니다. 그렇다면 벽은 언제 놓는 것이 이득일까요? 벽을 놓는 행위는 `1턴` + `벽 1개`의 비용보다 더 큰 이익을 가져올 때에만 가치가 있습니다.
이득이 되는 벽의 조건
- 경로를 2칸 이상 늘리는 벽**: 가장 확실하게 이득이 되는 벽은, 상대의 경로를 **두 칸 이상** 늘리는 벽입니다. 이는 직접적이고 수치화할 수 있는 템포 우위를 가져옵니다.
- 추가적인 전략적 이득을 얻는 벽**: 상대의 경로를 단 한 칸만 늘리더라도, 그 수가 추가적인 전략적 이점을 가져온다면 훌륭한 수가 될 수 있습니다. 예를 들면 다음과 같습니다.
- 점프 주도권 확보**: 상대가 한 칸 더 움직이게 만드는 것이 결정적인 점프를 내가 먼저 할 수 있게 만든다면 이는 게임을 이기는 수가 될 수 있습니다.
- 불리한 위치로 동선 강제**: 상대 말을 강력한 중앙 라인에서 벗어나 보드 가장자리로 움직이도록 강제하는 경우입니다.
- 미래의 경로 확보**: 3x3 영역 전술에서 설명했듯이, 나중에 안전하게 사용할 수 있는 자신만의 '터널'을 미리 건설해두는 경우입니다.
따라서 가장 효율적인 벽에 대한 새로운 원칙은 다음과 같습니다: **"나의 1턴과 벽 1개를 소모하여, 상대의 경로를 2칸 이상 늘리거나, 1칸을 늘리면서 추가적인 전략적 이득을 얻는 수"**
벽 가치의 유동성: 상황의 중요성
위에서 설명한 '이득이 되는 벽'의 조건은 좋은 기준을 제공하지만, 벽의 진정한 가치는 매우 유동적이며 게임의 상황에 따라 계속해서 변합니다. 수치상으로는 비효율적으로 보이는 벽이 어떤 상황에서는 게임을 승리로 이끄는 결정적인 한 수가 될 수 있습니다.
- 게임의 단계**: 게임 후반에 놓는 벽은 초반의 벽보다 훨씬 더 가치가 높은 경우가 많습니다. 초반에는 상대가 우회할 경로가 많지만, 서로의 경로가 거의 정해진 후반에는 단 하나의 벽이 승패를 결정짓는 최종 일격이 될 수 있습니다.
- 상대의 남은 벽 개수**: 상대에게 남은 벽이 거의 없거나 없을 때 나의 벽은 훨씬 더 강력한 힘을 발휘합니다. 상대가 맞불을 놓을 수 없다면, 나의 방해 공작을 그대로 감수하며 여러 턴을 소모해야 하기 때문입니다. 나의 마지막 벽은 종종 가장 강력한 무기가 됩니다.
- 보드 위의 위치**: 벽의 가치는 위치에 따라서도 달라집니다. 중앙에서 단순히 2칸을 돌아가게 만드는 벽보다, 상대를 보드 가장자리로 몰아넣어 게임 내내 선택지를 제한하는 벽이 전략적으로 더 가치 있을 수 있습니다.